"Offers Natural Media Painting
and Image Editing Capabilities!"
![]()
Procreate Painter 7 is is a painting application that lets you simulate natural media tools, from felt pens, charcoal, and colored pencils to watercolor and oils. You can use a wide variety of traditional art-making tools, including the following: paint brushes, such as watercolor brushes, oil paint brushes, impasto brushes, and airbrushes; dry media such as artist chalk, oil pastel, and charcoal; pencils, such as 2B, colored pencil, and flattened pencil; and pens, such as calligraphy pens, fine-point pens, and scratchboard pens. You can paint with patterns, gradients, texture, noise, fire, glow; clone images in magical ways; use the new Liquid Ink brushes; paint with depth; and watch as individual brush hairs pick up underlying colors. Plus, you can use the software for image-editing to: sharpen, soften, and distort scanned photographs; clone with perspective; or make your image appear as if it were viewed through textured glass. Painter 7 has many new features and enhancements and is easier to use, offers more natural media features, and has better color management. The program has changed hands over the last few years: from Fractal Design to MetaCreations to Corel to Procreate, which is Corel's new professional line of products that includes other items such as KPT Effects and KnockOut. For digital artists that were worried about the future of Painter, you will be pleased and impressed by this version. Corel has made serious improvements to the software and seems dedicated to keeping and enhancing the product!
Procreate Painter is available for the PC and Macintosh at the price of $499.00. Registered users of previous versions of Fractal Design Painter 4 and 5, MetaCreations Painter 5.5 and 6 or Corel Painter 6 are eligible to purchase the upgrade version of Painter 7 for $199. See the Procreate web site for more information: http://www.procreate.com
Key Features
- Customizable Workspace that allows you to create custom palettes and arrange your workspace to accommodate your personal style. Custom keyboard shortcuts are also supported.
- Context Menus that let you access common controls specific to the palette or tool currently being used.
- New Watercolor Technology that recreates the medium of natural watercolor with more flexibility and control.
- New Liquid Ink Technology mimics the viscosity and surface texture of a thick, gluey medium like ink or paint.
- Directional Grain Shading so that when covering an area completely in color, it requires a back and forth wrist motion to ensure that all areas of the surface are fully covered.
- Enhanced Text Capabilities so that you can access all text options, including font, alignment, point size, tracking, leading, opacity and curve style, from a single drop-down palette.
- Enhanced Color Management Features such as an enhanced interface for CMYK preview and profile selection, updated ICC profiles and color-managed CMYK import and export.
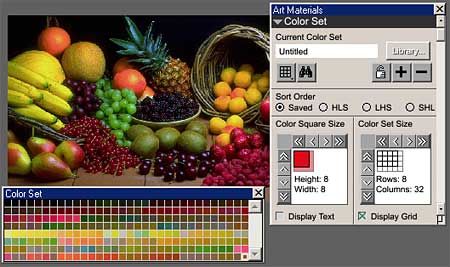
- Color Set Enhancements so you can create color sets from an image, an active layer, or active selection.
- New Brush Library Architecture that lets you create custom brush libraries quickly and easily.
- JPEG and GIF Preview Enhancements so that there is a live preview when saving JPEG and GIF images.
- Enhanced Adobe Photoshop Compatibility that allows you to move files seamlessly between Painter and Photoshop.
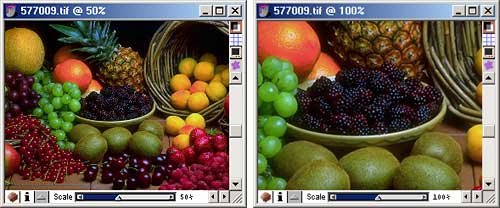
- New Continuous and Variable Zoom that lets you zoom in on an image in a continuous motion at a user-defined value.
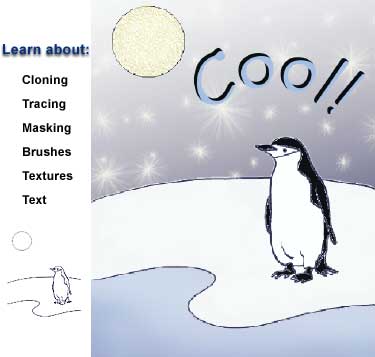
- New Perspective Grids that aid in setting up and drawing three dimensional images. See image to the left for view of options.
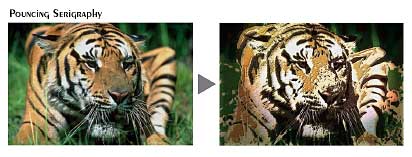
- New Effects such as Distress Serigraphy.
- Samples of KPT 5 Filters: FraxFlame, ShapeShifter, and Smoothie.
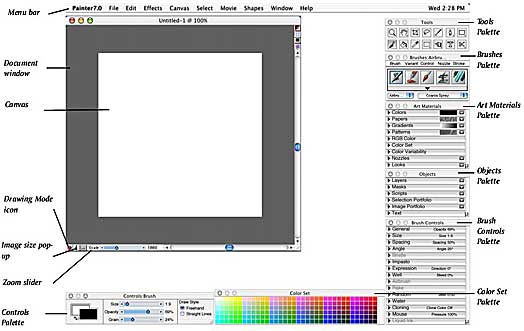
At a quick glance, you might think that the interface in Painter 7 was not changed, but as you start to use it, you will find that there are a number of improvements that make it easier to learn and use. It's tighter, better organized, and easier to customize. You can now select which palettes display in the Brush Controls palette, Objects palette, and Art Materials palette to reduce the number of palettes on screen. There are new buttons in the Layers and Masks sections of the Objects palette, and the program now includes context menus that let you access common controls specific to the palette or tool currently being used. Users who have a two-button mouse can access the context menus by clicking the right-mouse button. For Macintosh users who do not have a two-button mouse, the context menus can be accessed by using the CTRL+ click command on any standard keyboard. There are also enhanced keyboard shortcuts to let you navigate image layers quickly and easily using the COMMAND key (Macintosh) or CTRL key (Windows). In addition, you can create keyboard shortcuts that are similar to other popular image-editing applications, such as Adobe Photoshop. This helps you reduce your learning curve and increase the ease with which you can learn the application. See top image to the left for a view of the interface. The middle image shows the preferences for the Brush Controls, Objects, and Art Materials palettes. The bottom image shows the shortcut dialog box.
Painter 7 has new watercolor technology and advanced controls that allow you to produce images just like real watercolor. Traditional watercolor benefits from the diffusive nature of pigment suspended in water. For instance, as a pigment-laden brush touches wet areas on watercolor paper, the pigment diffuses into the wet areas. And depending on the existing wetness of the paper and any pigment already present on the surface, the colors bleed together, creating an intricate lacework of inter-merged strokes of color. Painter 7 recreates this process by letting you control the wetness and evaporation rate of the paper. The interaction of these physical components simulates the diffusion and drying of a waterborne dye. This is a welcome improvement. Also, in previous versions of the program, if you applied a water color brush stroke, they were applied to the Canvas layer, and as such, were uneditable. With Painter 7, you can edit the water color layer, including erasing and blurring, without changing anything in the image layer. The Water section of the Brush Controls palette contains the following controls for customizing Water Color brushes:
- Wetness--lets you control the dilution and spread of the dye so that as wetness increases, the stroke expands across a larger surface area.
- Pickup--lets you control how much dye gets picked up as water diffuses into the paper. If the pickup is set to zero, the colors do not mix or leach. If the pickup is set to a high value, the paint strokes mix together as one is applied over the other.
- Dry Rate--lets you control how quickly the water dries as brush strokes are applied to the paper. If the dry rate is set to a low value, the brush strokes take longer to dry and diffuse wider into the paper. If the dry rate is set to a high value, the brush strokes take less time to dry and diffuse less into the paper.
- Evaporation Threshold--lets you control the minimum amount of water that can diffuse into the paper. If the evaporation threshold is set to a low value, the brush strokes diffuse further into the paper. If the evaporation threshold is set to a high value, the brush strokes diffuse less into the paper.
- Diffusion Amount--lets you control the amount of dye diffused and the contrast of the grain as a brush stroke diffuses into the paper.
- Accurate Diffusion--lets you specify a smaller or larger diffusion window for your brush stroke.
- Grain Soak-In--lets you control the graininess of the brush stroke as it dries.
- Wind Direction--lets you control the direction of the wind as the watercolor diffuses into the paper.
- Wind Force--lets you control the force exerted as the watercolor diffuses into the paper in the wind direction specified.
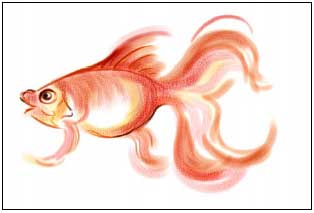
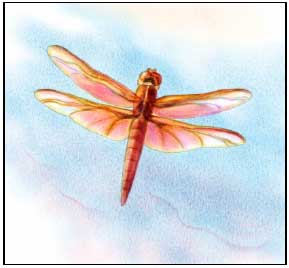
See the top image to the left for a view of the Brush Controls. The middle and bottom images to the left show a view of what you can create with the Water Color brushes using the the online tutorials by Cher Threinen-Pendarvis, author of The Painter 7 Wow! Book. Procreate will be releasing a series of twelve of these Water Color tutorials. The Goldfish was created by sketching the fish in color using the Fine Camel variant, painting loose washes using the Wash Bristle variant and then adding textured brushstrokes with the Grainy Wash Bristle. Final details were added with the Fine Camel variant. The Dragonfly was created using a variety of Painter 7 techniques that are very similar to what you would use in the traditional watercolor medium.
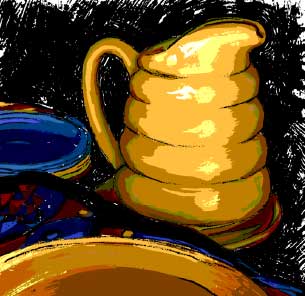
You can use the new Liquid Ink tool to mimic the viscosity and surface tension of a thick, gluey ink medium. If you apply Liquid Ink strokes to images in close proximity to one another, it causes them to appear to congeal and bind together as they do in the traditional medium. By applying a negative, resistive variation of Liquid Ink, you can carve away or remove Liquid Ink from an image. Also, you can apply Liquid Ink to serve as an invisible layer that resists normal Liquid Ink strokes. It's easy to simulate several other artistic media using the Liquid Ink technology, including ink and wax resist painting, scratch board, glass scraping, enamel, encaustic painting, intaglio, woodcut, linoleum, deckle-edges, and erosion. When you apply one of the Liquid Ink brushes to an image, a new Liquid Ink layer is automatically created in the Layers section of the Object palette and can be edited as you would edit any other layer. See top image to the left for a view of the Liquid Ink Brush Controls palette. The bottom image of the yellow pitcher shows what you can paint using the Liquid Ink brushes and the online tutorials by Cher Threinen-Pendarvis. It was created with the Graphic Camel and Graphic Camel Resist variants on several Liquid Ink layers, so that each color could be kept separate without mixing.
Painter 7 introduces text enhancements by combining the shape-based text tool and dynamic text features into one, easy-to-use tool. When you insert text using the Text tool, it resides on one layer, which is visible in the Layers section of the Objects palette, and is represented by a T icon. A text layer holds a single text block. You can specify any text settings in the Text section of the Objects palette. For instance, you can change the content and manipulate the characteristics of the text block by setting the font, weight, color, and shadow options. You can specify if the text follows a horizontal or curved line, which lets you flow text in a specific direction or around imagery. Plus, you have the ability to apply effects, gradations, blends or surface textures to individual blocks of text by exporting the text layer to a default layer. See image to the left for a view of the text options in the Objects palette.

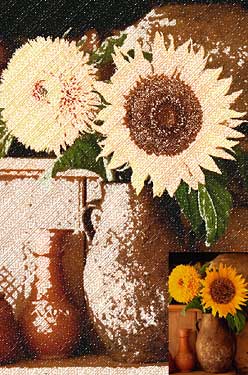
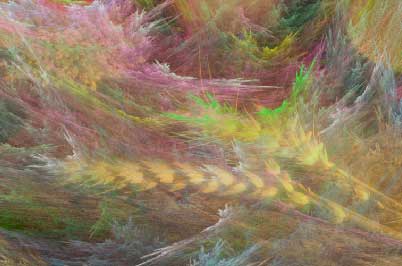
Painter 7 includes a sample of KPT 5 filters that let you add interesting effects to your images. For more imformation on KPT filters, see our review of the latest version, KPT Effects, a set of nine creative plug-in filters for Painter, Photoshop and other compatible hosts, that allows you to apply image transformations and original effects ranging from realistic to artistic to surprising. The three KPT filters that come with Painter 7 are:
KPT FraxFlame--this filter creates fractals that look like natural phenomena. You can choose different flame styles and render them as images. See image to the left for view of this filter applied to a photo.
KPT ShapeShifter--this filter lets you create limitless shapes and objects with refracting glass edges. You can also add 3D light sources to beveled metallic surfaces; create soft, curved, and illuminated Web buttons; design user interface (UI) buttons; and manipulate text.
KPT Smoothie--this filter lets you clean "dirty" masks in seconds instead of hours. Creating ultra-smooth edges on black alpha masks is now a realtime filter.
Windows:
- Windows 98, 2000, Windows Me or Windows NT 4.0
- IBM-compatible PC, Pentium 200 processor or higher
- Adobe Photoshop 4 or higher (or compatible host)
- 64 MB RAM
- 24-bit (800 x 600) color display
- CD-ROM drive
- Mouse or tablet
Macintosh:
- Mac OS 8.6 or higher, or Mac OS X
- Power Macintosh G3 or higher
- 64 MB RAM (128 MB RAM for Mac OS X
- 24-bit (800 x 600) color display (1024 x768 for Mac OS X)
- CD-ROM drive
- Mouse or tablet
Web Page Design: Macromedia Dreamweaver 4.0
| Educational | Books | Utilities | Web Tools | Legal | Articles